Lionel d'Hauenens
|
0
|
August 12, 2025


esReverse now supports Microsoft Windows 11 up to version 24H2 Build 26100.4066, which matches the May 27, 2025 update (KB5058411 and KB5061977).
This addition makes it possible to set up a Windows 11 environment directly inside esReverse, giving analysts a safe and realistic space for binary analysis and controlled reverse engineering on the latest operating system.
Security work often targets Windows. Running Windows 11 in emulation inside esReverse gives you a controlled lab to debug applications, inspect suspicious binaries, and reproduce tricky issues without risking production. With Time Travel Analysis, you record a run once and replay it deterministically. You can move backward and forward through execution, stop on the exact instruction you care about, inspect registers and memory, and share the trace with your team. It is a reliable way to validate fixes and try cumulative updates before a wider rollout.
Some recent versions of Windows 11 may show graphic glitches during emulation. These do not affect functionality but can be visually distracting. We are working on a fix.
The most recent build, KB5058499 (OS Build 26100.4202 from May 28, 2025), does not work in emulation mode and will freeze at random on the desktop.
If you choose to apply a lightening process, removing unnecessary services, features and background tasks to improve speed, remember that future updates can restore some of these components.
Start by downloading a Microsoft ISO, for example:
Win11_24H2_EnglishInternational_x64.isoOn a Linux system with QEMU 8.2.2, create your QCOW2 disk:
qemu-img create -f qcow2 -o compat=1.1 /path/to/your/disk.qcow2 64GThen launch the virtual machine:
qemu-system-x86_64 \
  -enable-kvm \
  -machine pc-i440fx-2.9 \
  -cpu host \
  -m 4096 -smp 2 \
  -drive file=/path/to/your/disk.qcow2,format=qcow2,if=ide \
  -drive file=/path/to/Win11_24H2_EnglishInternational_x64.iso,media=cdrom,if=ide \
  -netdev user,id=n0 \
  -device e1000,netdev=n0 \
  -boot d \
  -vga std \
  -usb -device usb-tablet
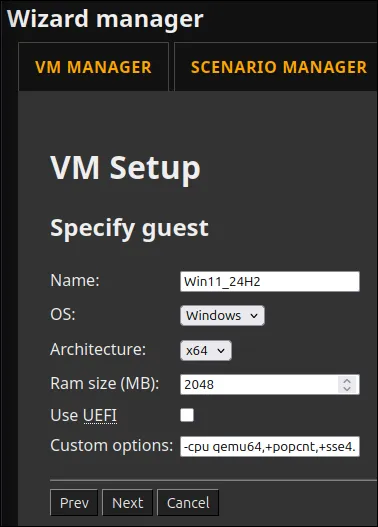
Once the installation is complete, import the VM into esReven Project Manager with the following configuration.
Custom options:
-cpu qemu64,+popcnt,+sse4.1,+sse4.2Use UEFI: unchecked.
Windows 11 enforces TPM, Secure Boot, RAM and CPU checks. You can bypass them in two ways.
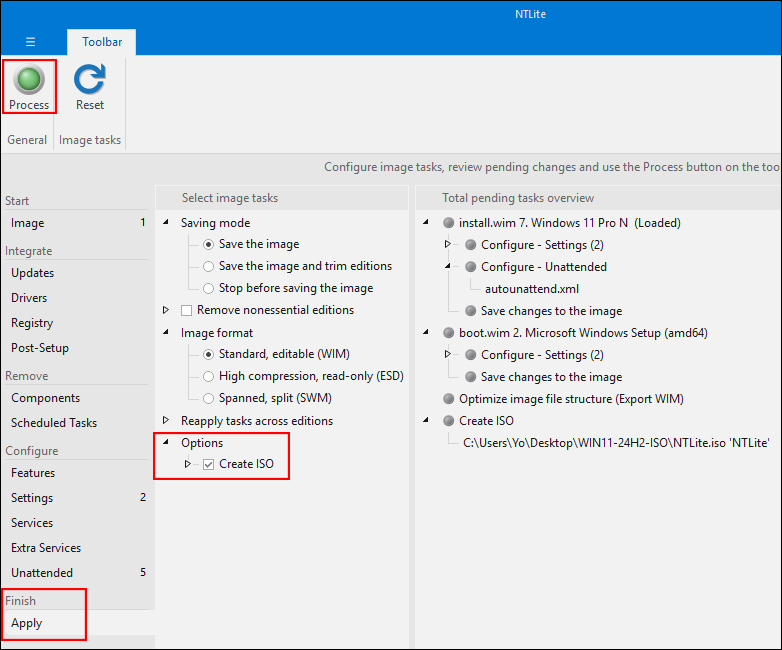
Open the ISO in NTLite and select your edition, for example Pro N.
Go to Settings → System and disable:
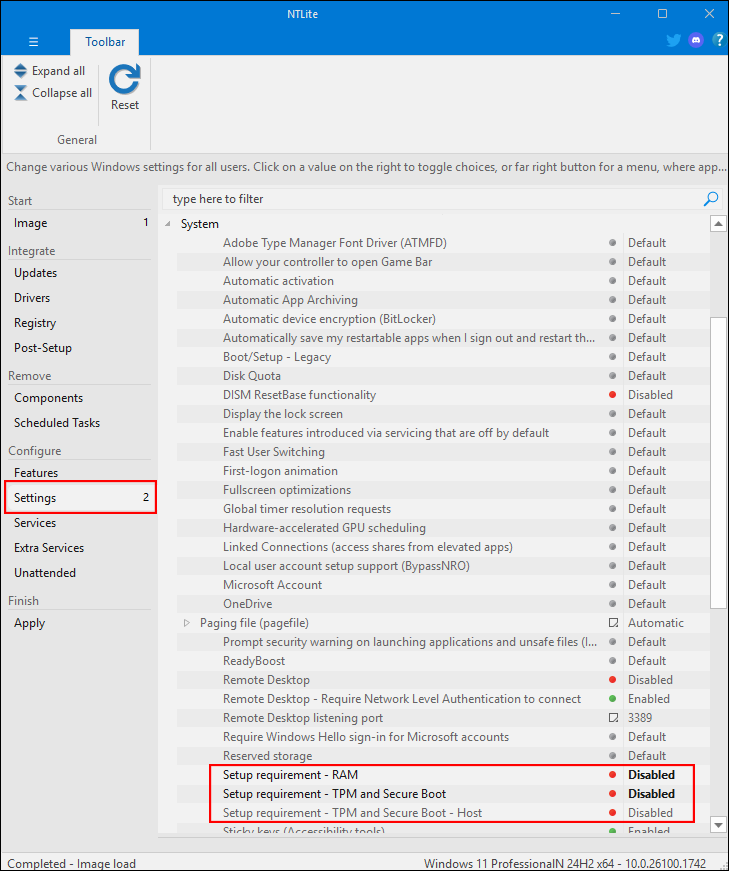
Go to Unattended and enable:

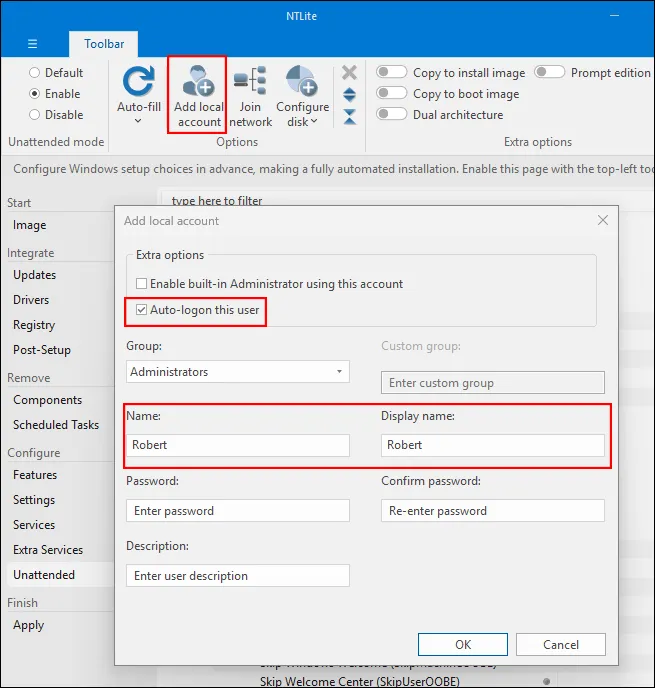
If you want to add your local account in advance, click Add local account, set Name and Display Name, leave the password empty if you prefer, and check Auto-logon.
Click Apply, check Create ISO, then click Process.
At the language selection screen, press Shift+F10 to open a terminal and start the registry editor:
regedit
Navigate to:
HKEY_LOCAL_MACHINE\SYSTEM\Setup
Create a key named:
LabConfig
Inside this key, create the following DWORD (32-bit) values and set each to 1:
BypassTPMCheck
BypassSecureBootCheck
BypassRAMCheck
BypassCPUCheck
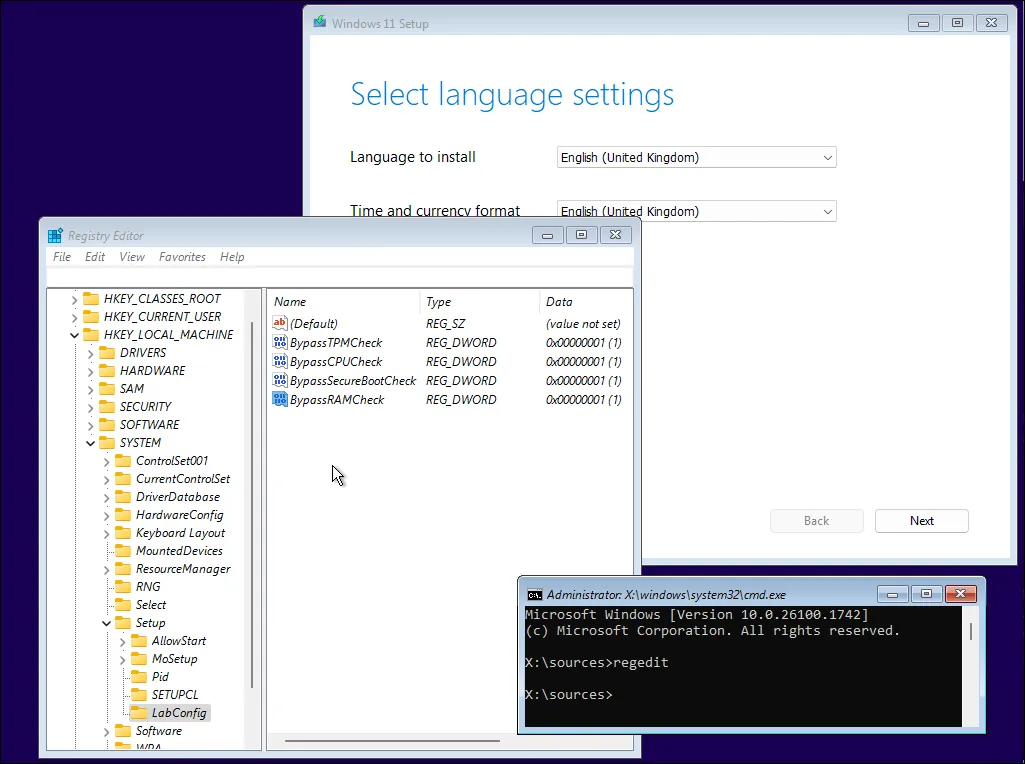
Close the tools and continue the installation.
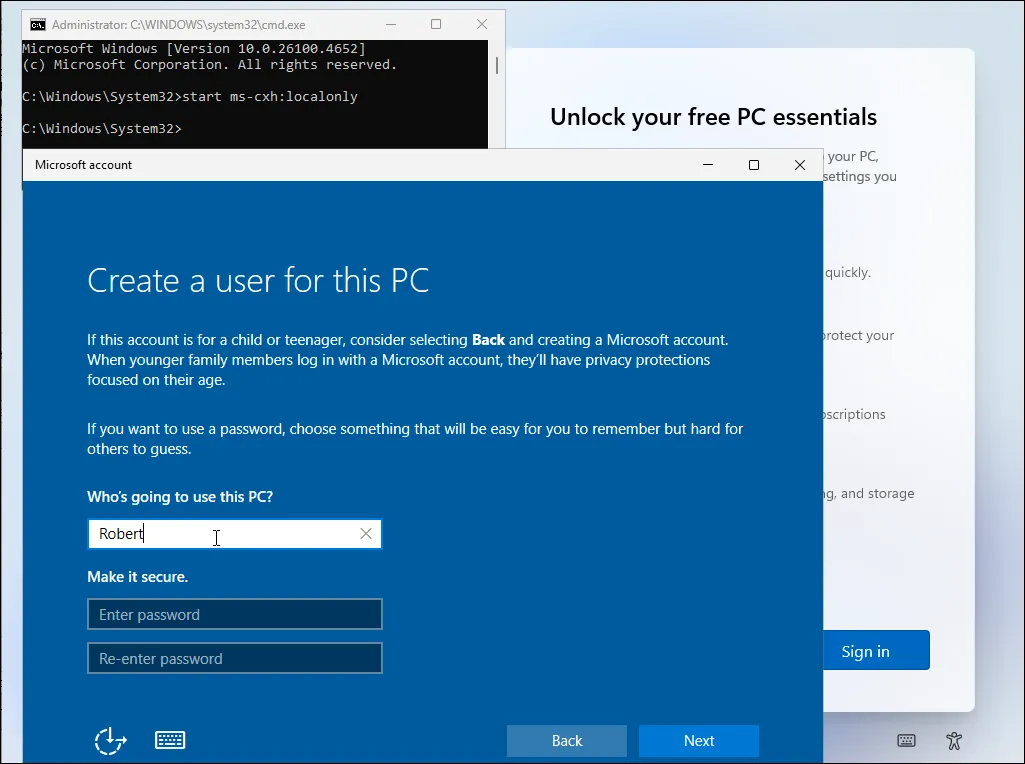
When Windows asks you to sign in and you want a local account, press Shift+F10 again and run:
start ms-cxh:localonly
Follow the prompts to create the local account and continue.
After installation, you can make the VM faster and more responsive in emulation by removing non-essential features and background tasks. The Professional edition of NTLite allows post-installation cleanup on an existing system. You can also use a PowerShell script to strip components, disable services and neutralise scheduled tasks. The aim is a lean Windows that keeps CPU usage low and stays smooth during binary analysis.

You now have a Windows 11 VM that runs in emulation mode inside esReverse. Install the updates you need, keeping in mind that some optimisations may be reverted by cumulative updates. From there, you can move straight into binary analysis on a current Windows environment.


